Friday, September 12, 2014

I'll Be Waiting For You There


Today is a special day for our family. Today, my Grandfather Vaughn Madsen passed on to be with his dear wife and other family and friends. Although it's hard to see the last of his generation go and to no longer have his beautiful presence in our lives, I gain comfort from knowing where he is now. This poem that I wrote in High School captures best my feelings today. I love you Grandpa. You will always be remembered.

I'll Be Waiting For You There


Don't tilt your head toward the ground
And shed a tear of sorrow.
Don't grieve for all that might have been, 
But look toward tomorrow.
My dearest friends and family
Take comfort here and know
That although my life be red as scarlet
The Lord will make it white as snow.

"Parting is such sweet sorrow."
I believe this phrase holds true,
For the loss of a simple mortal man
Brings sorrow to many of you.
The joy and peace comes into play
With the knowledge of when
That day will come, not long from now
When we shall meet again.
In a world of beauty with greener greens
And skies of more brilliant blues
Cleansed pure of all the wickedness 
And evil's darker hues.

In that beautiful place of bliss,
Free of worry or care,
Take comfort, my friend, in knowing
I'll be waiting for you there.

- Tory Norman
March 5, 2001

Thursday, September 11, 2014

The Prison


The Prison

All of my loved ones and all that I hold dear
Long ago have left me alone and sitting here.
My prison crumbles around me and yet I cannot leave.
Still, you'll find me waiting, waiting with no reprieve. 
Light no longer enters, the windows shuttered years ago.
There's nothing left for me to do and yet I cannot go.
No laughter echos in the corridors, silence fills the soul
And still you find me captive in my dark and empty hole.
Too weak to stand, to sore to sit, in limbo I reside.
No longer independent, even my dignity denied. 
How I long to see the sunlight, how I long to hear the breeze, 
How I long to do what e'r I want and go just where I please.
I pray each day for freedom and accept whate'r may come.
Until that time I sit here in the prison I've become.

     - Tory Norman
        March 6, 2014


I wrote this poem after visiting my grandfather who was in his high 90s. So often we cling to this life and death seems so tragic. But as I looked at my grandfather, I saw something so different. His eye sight was failing, he could no longer hear well. His limbs were weak and he no longer had the strength to practice his favorite hobbies or even care for his home. His friends and family his age were all gone and he had few people he could associate with. As I looked at my grandfather, I didn't see the great man that I knew as a child. I instead saw a sad and humbled man trapped inside the prison of his aging earthly frame. 

With the knowledge of the eternal gospel and the atonement of Christ comes a different perspective. When death finally touches my grandfather, he will return to the presence of a loving Heavenly Father to be reunited with his dear wife, family and friends. He will become perfected and no longer restricted and imprisoned in his deteriorating earthly body. When death finally touches him, he will be free.

I want to see my grandfather happy again. I want to know him and see him as he really is. And for this reason, I look forward with joy to the day when he becomes free.

Around the World in 80 Doughs: #5 - Christmas Gingersnaps


One of my favorite treats at Christmas time are Gingersnaps. The strong scent and taste of ginger and spice brings to mind so many memories of Christmas and the crunchy outside combined with a soft and chewy inside is absolutely delightful. In years past, I have typically depended on store bought ones, but this year the chef inside me decided I could make them myself. I was so pleased with the results, that I thought I'd share them here for others that enjoy these traditional cookies as much as I.

As is my kitchen tradition, I love to investigate the origins of the foods that I bake. Spiced cookies and cakes like the Gingersnap have been popular since the medieval ages. Most agree that the Gingersnap, like Gingerbread, is derived from a traditional German cookie called Lebkuchen. The Lebkuchen has many varieties that date back to the 13th Century and has since become a traditional treat at Christmas time there. This may explain why Gingerbread and Gingersnaps found their way into our Christmas traditions today. 

Many Gingersnaps are baked thin and crunchy which leads some to believe that the name is derived from the snapping sound they make when bitten into or broken. Others believe that the "snap" part of the name comes from the old English term which meant bite, portion or morsel. Since I tend to prefer the chewy variety of Gingersnaps, I prefer the idea that the name means ginger bites more than crunchy ginger cookie. But whatever your preference, they are delightful cookies that have become an international Christmas tradition for centuries. 

My favorite variation of the Gingersnap is a chewy center with a light glaze which I was able to achieve with a combination of recipes which I borrowed from the following locations:

http://www.joyofbaking.com/Gingersnaps.html
http://www.kingarthurflour.com/recipes/simple-cookie-glaze-recipe

The Cookie:

The following ingredient mix made exactly three dozen cookies for me:

• 3/4 cup unsalted butter
• 1/2 cup firmly packed brown sugar
• 1/2 cup granulated white sugar
• 1/4 cup unsulphered molasses
• 1 large egg
• 1/2 teaspoon pure vanilla extract 
• 2 cups all purpose flour
• 1/2 teaspoon baking soda
• 1/4 teaspoon salt
• 1 1/2 teaspoons ground cinnamon
• 2 teaspoons ground ginger
• 1/2 teaspoon ground cloves

In a large mixing bowl, begin by beating the butter until soft. If you don't have unsalted butter, you can substitute it for salted butter by eliminating or reducing the amount of salt in the recipe. Once the butter is soft, add in the brown sugar, granulated sugar, egg, vanilla, and molasses. One trick I learned with the molasses is to spray the measuring cup with non-stick spray first before measuring the molasses. This helped the molasses slide out of the measuring cup much easier. 

Mix these ingredients until it is consistently mixed. In a separate bowl, mix together the flour, baking soda, salt, cinnamon, ginger and cloves. Once mixed, add the dry ingredients to the dough and mix well. 

Preheat the oven to 350 degrees. On a large cookie sheet, spread a sheet of parchment paper. Roll the dough into small balls. The recipe called for one inch balls. I know this sounds archaic, but I measured the balls by making the diameter about the size of my index finger from the point to the first knuckle. This made a perfectly sized cookie and yielded a consistent three dozen cookies in one batch. Pour some granulated sugar in a bowl and roll the dough balls in the sugar before placing on he parchment paper. In addition to giving the cookies the perfect look, this also helps reduce the stickiness of the dough balls before placing them to bake. Space each ball about two inches apart as they spread while baking. I places four rows of three balls on each sheet and they came out perfect. Finally, us a glass cup with a flat bottom and press each cookie to about half their original height making little flat disks instead of balls. Place the cookies into the oven for 12 minutes. 

Glaze:

While the cookies are baking, you can make the glaze. This glaze dries hard a shiny and adds the perfect finishing touch to your Gingersnaps. One thing I learned from my last attempt is that less really is more when it comes to glaze. I got a bit carried away on my first batch and there was too much glaze on the cookies. Not only does it take forever for the glaze to dry when it's too thick, it also dulls the ginger flavor. My recommendation is to heat the glaze slight in the microwave to thin it before application and spread a light coat of glaze on each cookie using a spatula or brush.

• 2 1/4 cups powdered sugar
• 2 tablespoons light corn syrup
• 2 tablespoons and 1 teaspoon of milk

In a small bowl, mix all ingredients until consistent and smooth. Once cookies come out of the oven, let them sit about ten minutes to cool and firm up. Otherwise, you might damage the soft cookie when trying to apply glaze. Just prior to applying the glaze, heat the glaze a few seconds in the microwave in a microwave-safe bowl to thin the glaze. Apply a light layer of glaze on each cookie using a small spatula or brush. Let stand until glaze has fully hardened.

Monday, June 23, 2014

Around the World in 80 Doughs: #4 - Cherry Empanadas


Recipe yields a dozen empanadas


Crust:
• 2 2/3 cups all-purpose flour
• 1 teaspoon salt
• 3/4 cup shortening
• 6 tablespoons cold water

Filling:
• 3 cups fresh or thawed cherries, pitted
• 3/4 cup granulated sugar
• 3 3/4 tablespoons cornstarch
• 1/4 teaspoon ground cinnamon

Glaze:
• 1 1/2 cup powdered sugar
• 3/4 teaspoon vanilla 
• 2 to 3 tablespoons milk

Prepare the dough
Begin by mixing the flour and salt together, then mix in the shortening with your hands until all of the dry ingredients are blended with the shortening and the dough has a crumbly texture. Add the cold water and continue mixing with your hands until the dough is smooth and consistent. Wrap the dough in plastic wrap and place in the refrigerator for 30 minutes. 

Prepare the filling
While you are waiting on the dough, place the pitted cherries in a saucepan and mash lightly to extract the juice from the cherries. Seperate the juice from the cherries and place in a seperate bowl. Mix the cornstarch into the juice and blend until the cornstarch is fully dissolved into the cherry juice. Add the juice mixture back into the saucepan with the cherries. Let stand for 15 to 20 minutes. 

Place the saucepan with the filling on high heat and being to a boil while stirring constantly. Once boiling, turn the heat down to about half and continue stirring for 2 minutes or until the filling is thickened. Remove from the heat and mix in the cinnamon. Let cool.

Assemble the empanadas
Using a rolling pin, roll the dough out fairly thin on a clean, lightly floured surface. Cut out the empanadas in circles 4.5" to 5" in diameter. To get a circle that large, I used a plastic container lid, but you can use any round object that size. The dough should yield about 12 empanadas. Place a small spoonful of filling in the middle of each circlular empanadas. Be careful not to overfill the empanadas as they will break open when they are heated. Wet the edges of the empanadas lightly with water and fold  them over to create pockets in a half-circle shape. Seal the edges with a fork and poke the empanada pockets with the fork once. 

Bake the empanadas
Cover a baking sheet with parchment paper and place the assembled empanadas on the baking sheet. Pre-heat the over to 375 degrees and bake for 30 - 35 minutes until golden brown on top. 

Prepare the glaze
While the empanadas are baking, mix the powdered sugar, vanilla and milk together with a spoon. When the empanadas are fresh out of the oven, drizzle the glaze over the top of the empanadas. Let cool. 

The empanadas are best served when the outer crust has cooled, but the inner filling is still warm.

Sunday, February 16, 2014

Find Joy Therein

Today has been a beautiful (yet blustery) Sunday. The sun is shining, our daisies are starting to poke through the ground. It finally looks like spring may be on its way. All of this beauty slowly coming back to life reminded me of a small poem I wrote a few years back to help me recognize the beautiful miracles that our Heavenly Father puts before us every day. It is entitled:

Find Joy Therein

The hustle, the bustle, the honks and the noise;
New cell phones, new gadgets, new trucks and new toys.
A tiny blue flower in a sidewalk crack grows.
It blossoms and blooms yet nobody knows.

Running blind through our lives we look not around;
Not seeing a sight; not hearing a sound.
How amazing it is to see a sunrise.
Amazing more still when a new baby cries.

All of these things God gave for a reason:
That we might be happy no matter the season.
My favorite commandment - you see - has been:
"In all things, find joy therein!"

   - Tory Norman 04/2012

Tuesday, December 24, 2013

Around the World in 80 Doughs: #3 - Lithuanian Kūčiukai


The Story

Lithuania is a country rich in tradition, especially at Christmas time. One of Lithuania's great Christmas traditions is their Christmas Eve meal. Fresh straw symbolizing the manger that the Christ child was placed in is spread across the table and then a table cloth is put over it before setting and decorating the table. Places are set for loved ones who are away or have passed away in the previous year and a candle is lit on their plate. The belief is that their spirits would be present at the family meal. 

The Christmas meal itself does not include milk products, meat (except for fish), or eggs. Even so, there is a wealth of delicious foods served in twelve courses signifying the twelve apostles. Among the many plates served that night is a traditional poppy seed bread called Kūčiukai (pronounced Koo-Choo-Kaye). Since milk products are not allowed, a special milk is made by boiling poppy seeds and the Kūčiukai is eaten by soaking the small breads in the poppy milk.

The Bread

In keeping with the traditions surrounding the Christmas Eve meal, the Kūčiukai are made without any milk or eggs. Although recipes vary slightly, they are often a sweet bread baked with a hard crust on the outside and a softy chewy inside. They are also usually very small, usually only an inch or so cubed once baked. 

As mentioned above, the Kūčiukai is eaten during the Christmas Eve meal by putting several into a bowl or cup and soaking them in a special milk, called Aguonpienis (pronounced Ah-guon-pien-is), made by blending and squeezing poppy seeds boiled in water.

The Recipe

Ingredients for the Kūčiukai:
  • 1/2 Cup of warm water
  • 2 Tablespoons sugar
  • 1 Teaspoon dry yeast
  • 2 Cups flour
  • 1 Teaspoon salt
  • 1 Tablespoon cooking oil
  • 1/4 Cup poopy seeds
Dissolve the sugar into the warm water and add the dry yeast. Let this stand for a few minutes so that the yeast can cultivate. In the meantime, sift the flour into a large bowl and add the salt and poppy seeds. Mix the dry ingredients well. Add the oil and yeast mixture and knead together for about ten minutes until consistent. Let rise until the dough has doubled in size. 

Preheat oven to 350 degrees F. Cut dough into four equal parts. roll each part into long strands about 1/2 inch in diameter. Cut each strand into small cubes and place on a buttered cookie sheet. Bake for 15 to 20 minutes. 

Ingredients for the Aguonpienis:
  • 1/2 Lb. poppy seeds
  • 2 Cups boiling water
  • 1/4 Teaspoon almond extract
  • 1 Tablespoon honey
In a bowl or cooking pot, place the poppy seeds and our the boiling water over the seeds. Let stand for one hour. Afterwards, pour poppy seed mixture into a blender and add almond extract and honey. blend on high for three or four minutes until the mixture turns a white-ish brown color. Layer several layers of cheese cloth and pour a portion of the mixture into the cheese cloth. roll the cheese cloth around the mixture and squeeze tightly until all of the juice, or "milk", has been squeezed out. Throw the pulp out and repeat the process until all of the milk has been pressed out of the mixture. Refrigerate until serving time. 

To serve, place several Kūčiukai into a small bowl or mug and pour the Aguonpienis over them. Let the Kūčiukai soak before eating.


Saturday, August 10, 2013

Around the World in 80 Doughs: #2 - Bavarian Laugenbrezel


The Story

The pretzel, everyone knows it not only for its exquisite taste and texture, but more importantly for its unique, twisted shape. Today pretzels are made and sold in countries around the world. But where did they come from and how did they get their shape?

The origin of the Pretzel and its shape is more myth and legend than actual fact. The History of Science and Technology by Bryan Bunch and Alexander Hellemans details probably the most famous story behind this uniquely shaped bread. According to their account, in 610 AD, "...an Italian monk invents pretzels as a reward to children who learn their prayers. He calls the strips of dough, folded to resemble arms crossing the chest, 'pretiola' ("little rewards")".1 Unfortunately, for as popular as this story may be, no evidence exists to support it. 

Although this particular story may be just a legend, it is widely accepted that the bread's origin has its roots with early christians. The German name "brezel" is even derived from the Latin word bracchium meaning "arm" owing to the distinct resemblance of the pretzel shape with folded arms.1 

Another popular theory for the pretzel shape's origin dates back to the Roman era and resembles Roman ring-bread, which is a small, circular-shaped bread.

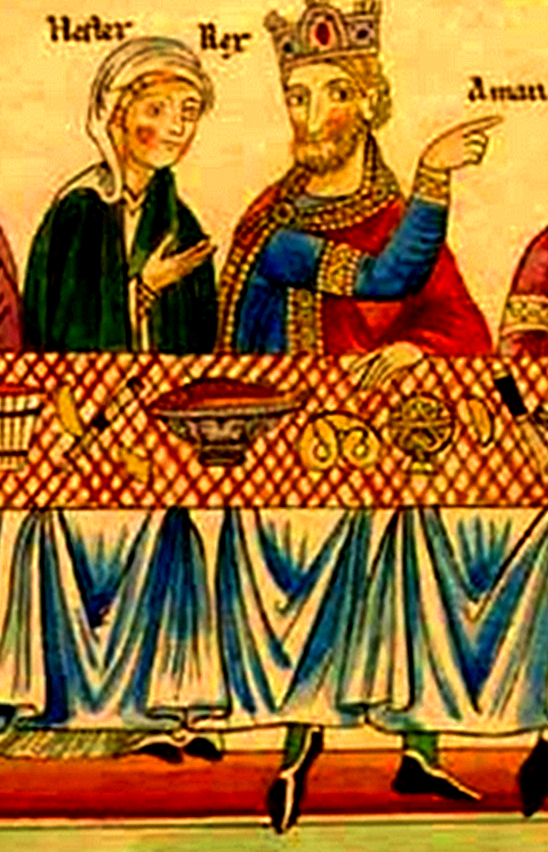
However the Pretzel got its shape, we know that it has been around for a very long time - at least as far back as the 12 century. In the Hortus deliciarum, a document dating back to the 12 century AD, there is an illustration showing a banquet with Queen Esther and King Ahasuerus in which a pretzel, with its distinct shape can clearly be seen on the table. 

Where it came from, we may never know. But one thing we do know, the Pretzel is here to stay. Particularly in Germanic countries, the pretzel has deep roots in their cultures and culinary history. The crest for the German Baker's Guild even displays a pretzel prominently on its shield.


Today, the Pretzel is used in many traditional celebrations as well. For Germans, it is a tradition to eat pretzels during the Good Friday dinner. Not only is the shape religious, but the bread consists of a simple recipe that does not contain eggs, lard, or dairy products which are forbidden during lent.2 Pretzels are also often associated with Easter. in some countries, pretzels were hidden for the children to find on Easter morning, and not eggs. Germans also associate the pretzel with good luck and good fortune. On New Years day, some exchange pretzels as a gift of luck for the coming year.

The Bread

Although there are many varieties of pretzel, the Laugenbrezel from Bavaria is probably the most common and traditional pretzel. The Laugenbrezel was actually invented by a Bavaria baker completely by accident. As the story goes, on February 11, 1839, a baker at the Munich Royal Café named Anton Nepomuk Pfanenbrenner was baking some sweet pretzels for his guests. His intention was to brush the pretzels with sugar water, but instead reached for the Natronlauge, a sodium hydroxide solution used to clean and disinfect the countertops. This would have been a serious Health Department violation and possibly a lawsuit today, but back then, the guests actually loved them!2

And so, although sodium hydroxide is a main active ingredient in drain cleaner, it is now a main ingredient in pretzels. To this day, the Laugenbrezel is dipped in a food-safe sodium hydroxide solution before baking. This is what gives the Laugenbrezel the hard brown crust and the soft center that is as signature to the pretzel as the shape.

The Recipe

As mentioned above, the secret to a good Laugenbrezel is the sodium hydroxide solution. If you are going to dip your food in sodium hydroxide, however, it is important to get a solution that is designed for and safe for food. Although people have sometimes commented on using soap-maker's sodium hydroxide, I would not advise anything that is not labeled food safe. I did find a small bottle (5 oz) of food grade sodium hydroxide online for relatively cheap from a company called Essential Depot (www.essentialdepot.com/servlet/the-547/5oz.-Food-Grade-Sodium/Detail) that you might want to check out. For my recipe, however, I found a recommendation to bake common baking soda in the oven as a way to imitate a sodium hydroxide solution. Baking soda is similar to sodium hydroxide, but not as powerful. When it is baked, however, the alkaline becomes more concentrated and it can work as a substitute for recipes like this. The substitute does not create a nice shiny brown crust like sodium hydroxide will (see my picture above), the crust is still crunchy and the inside is delightful.

To create the baking soda substitute, cover a cookie sheet with a layer of tin foil. Sprinkle baking soda on the tin foil and bake in the oven at 300 degrees F. for one hour. It is important to remember that when you take the baking soda out of the oven it will have a higher alkaline concentration and can irritate the skin. You should always handle the powder with gloves after removing from the oven. Store in a dry and sealed container so as not to allow the powder to collect moisture from the air.

Ingredients:
3 1/2 Cups of all-purpose flour
1 1/2 tsp yeast
1 tsp salt
1 tsp sugar
1/4 Cup butter
2/3 Cup warm water
1/2 Cup warm milk

Dissolve the sugar in the warm water and add the yeast to begin forming a yeast culture. While this is forming, add the other ingredients in a large mixing bowl. Add in the yeast culture and mix together to create a consistent dough. Knead the dough on a lightly floured surface until you can poke the dough with your finger and the dough springs back. Let the dough rise for one hour or until double in size. See my post on French Baguettes for tips on using your oven to help your dough rise if you can't find a warm place in your house (like when you bake bread at 10:00 at night like me). 

After the dough has risen to twice its size, break the dough down into little balls. I found that the dough makes a dozen 3 gram balls, but some people like larger 4 gram pretzels and the 4 gram balls are great for rolls too. I felt that 3 grams was a bit small for rolls. For our example here, though, I needed quantity over quality, so we went with 3 gram balls. 

Once all of your dough is broken down into balls, take each ball one by one and form pretzels (unless you want rolls, in which case, leave them as balls). To form a pretzel, I got my hands lightly wet and wet the countertop slightly by wiping my damp hand across it. This made the dough easier to roll. If the countertop and your hands are dry, the dough just tended to slide around and smash instead of roll. The idea when rolling is to get the edges thin while keeping the middle kind-of plump instead of being evenly rolled. Once you have rolled the ball out thin, twist the ends and fold them back on the body to form a pretzel knot. If you are struggling with this concept, there are several videos out there than demonstrate this. 

As you finish forming your pretzels, carefully place them in a ziplock bag and, when all of your pretzels are formed and bagged, put them in the freezer for one hour. Lightly freezing the pretzels hardens them so that they are easier to work with during the sodium hydroxide dipping process. 

After freezing your pretzels, you are ready for dipping and baking. During the dipping process, it is always a good idea to work with gloves and protective glasses. The sodium hydroxide solution or substitute solution can irritate if they come in contact with the eyes or skin. Also, be sure to clean up any splatters as they happen to avoid damage to surfaces (Pleasant warnings considering you're going to be eating this stuff in a few minutes, aren't they). Please be sure to read and adhere to all safety warnings when using the sodium hydroxide. Also, I have heard debates about what to put the solution in. I use a ceramic bowl for the solution, but I have heard of others using metal. 

My solution was a 4% mix which consisted of 2 teaspoons of powder to 2 Cups of water. 

Carefully stir the solution until the cloudy water becomes clear. This is how you know when the powder is fully dissolved. Now carefully dip each pretzel in the solution for 30 seconds. You may have to push them under the water as I found some pretzels (and particularly the rolls) wanted to float. After dipping, place the pretzels on a cookie sheet covered with a layer of parchment paper and immediately sprinkle with coarse salt or other desired topping. 

After dipping and salting, place the pretzels in the over at 450 degrees F. for about 15 minutes or until they are nice and brown on top. 

Once finished, remove from the oven and allow to cool. I got anxious on my first batch and wanted to try one fresh from the oven. I found that the pretzels stuck to the paper and tore in half when I tried to remove it. Once they cooled, though, they were easier to remove from the paper.

The Result

As I said earlier, using the baking soda substitute did not produce the dark brown crust I was going for, but the dough is top notch and the texture and flavor are amazing. It may seem like a lot of work at first, but it was lots of fun and well worth doing again. I'd say the pretzels were my favorite recipe so far and one I intend to continue to develop.

1 - www.bavarianpretzelfactory.com/history.html
2 - www.germanfoodguide.com/pretzel.cfm

LinkWithin